Jenkins On-Demand Agents
Jenkins
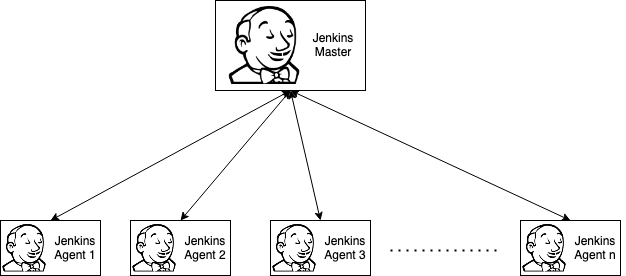
Jenkins is a server for automation that is free and open source. By automating the software development process, enterprises can save time and money. Jenkins is a tool that manages and controls software delivery processes across the whole lifecycle, including build, document, test, package, stage, deployment, static code analysis, and more.
A typical Jenkins running in any organization looks like the above diagram. But there are multiple problems with the above architecture.
- Once you have set up the Agent it is continuously running and has acquired resources.
- If CI increases change you have to add additional agent and vice versa.
- If any new tool requirement comes; you have to add that tool into the existing agent or add a new agent with the tool installed in it.
We can eliminate the above problems if we are using Kubernetes and use the existing cluster for our builds by integrating it with Jenkins. Then we can use on-demands agents as Kubernetes pods.
What Do You Need?
- Docker
- Minikube
Setting Up Environment
Setup Jenkins
Create a Jenkins instance by running the following command:
$ docker run -d --name jenkins -p 8080:8080 -p 50000:50000 jenkins/jenkins:lts
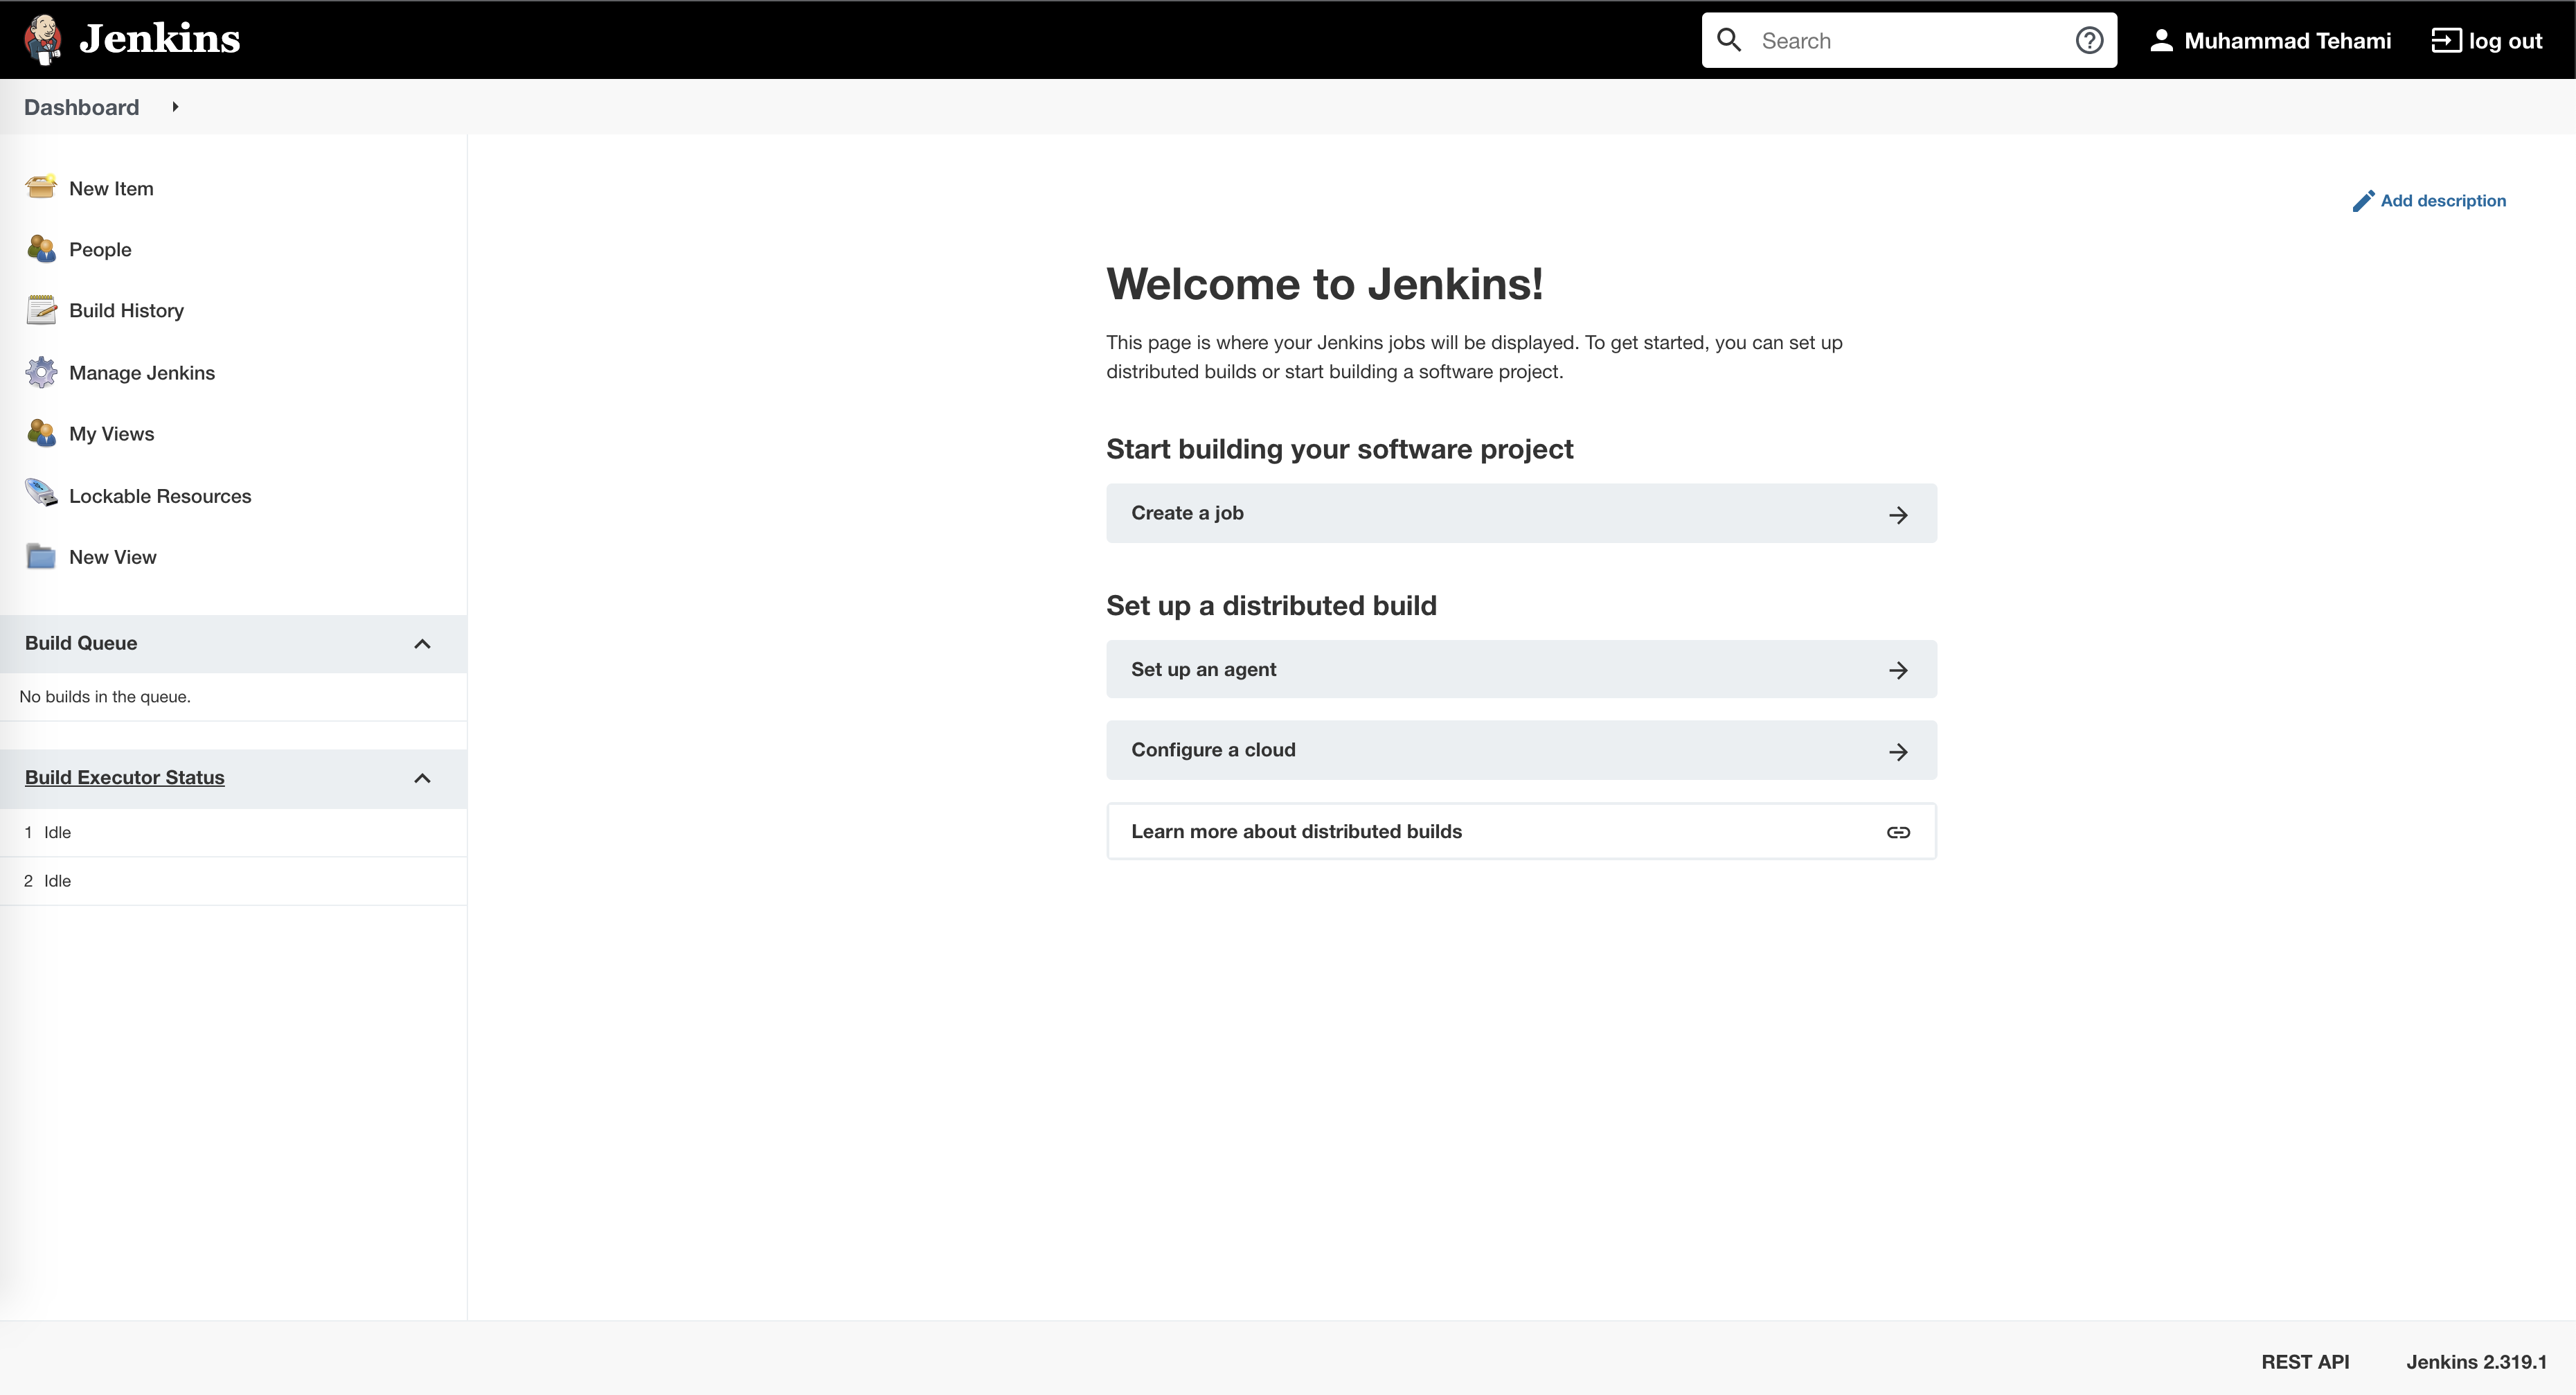
Go to http://localhost:8080 and wait for the following screen to come:
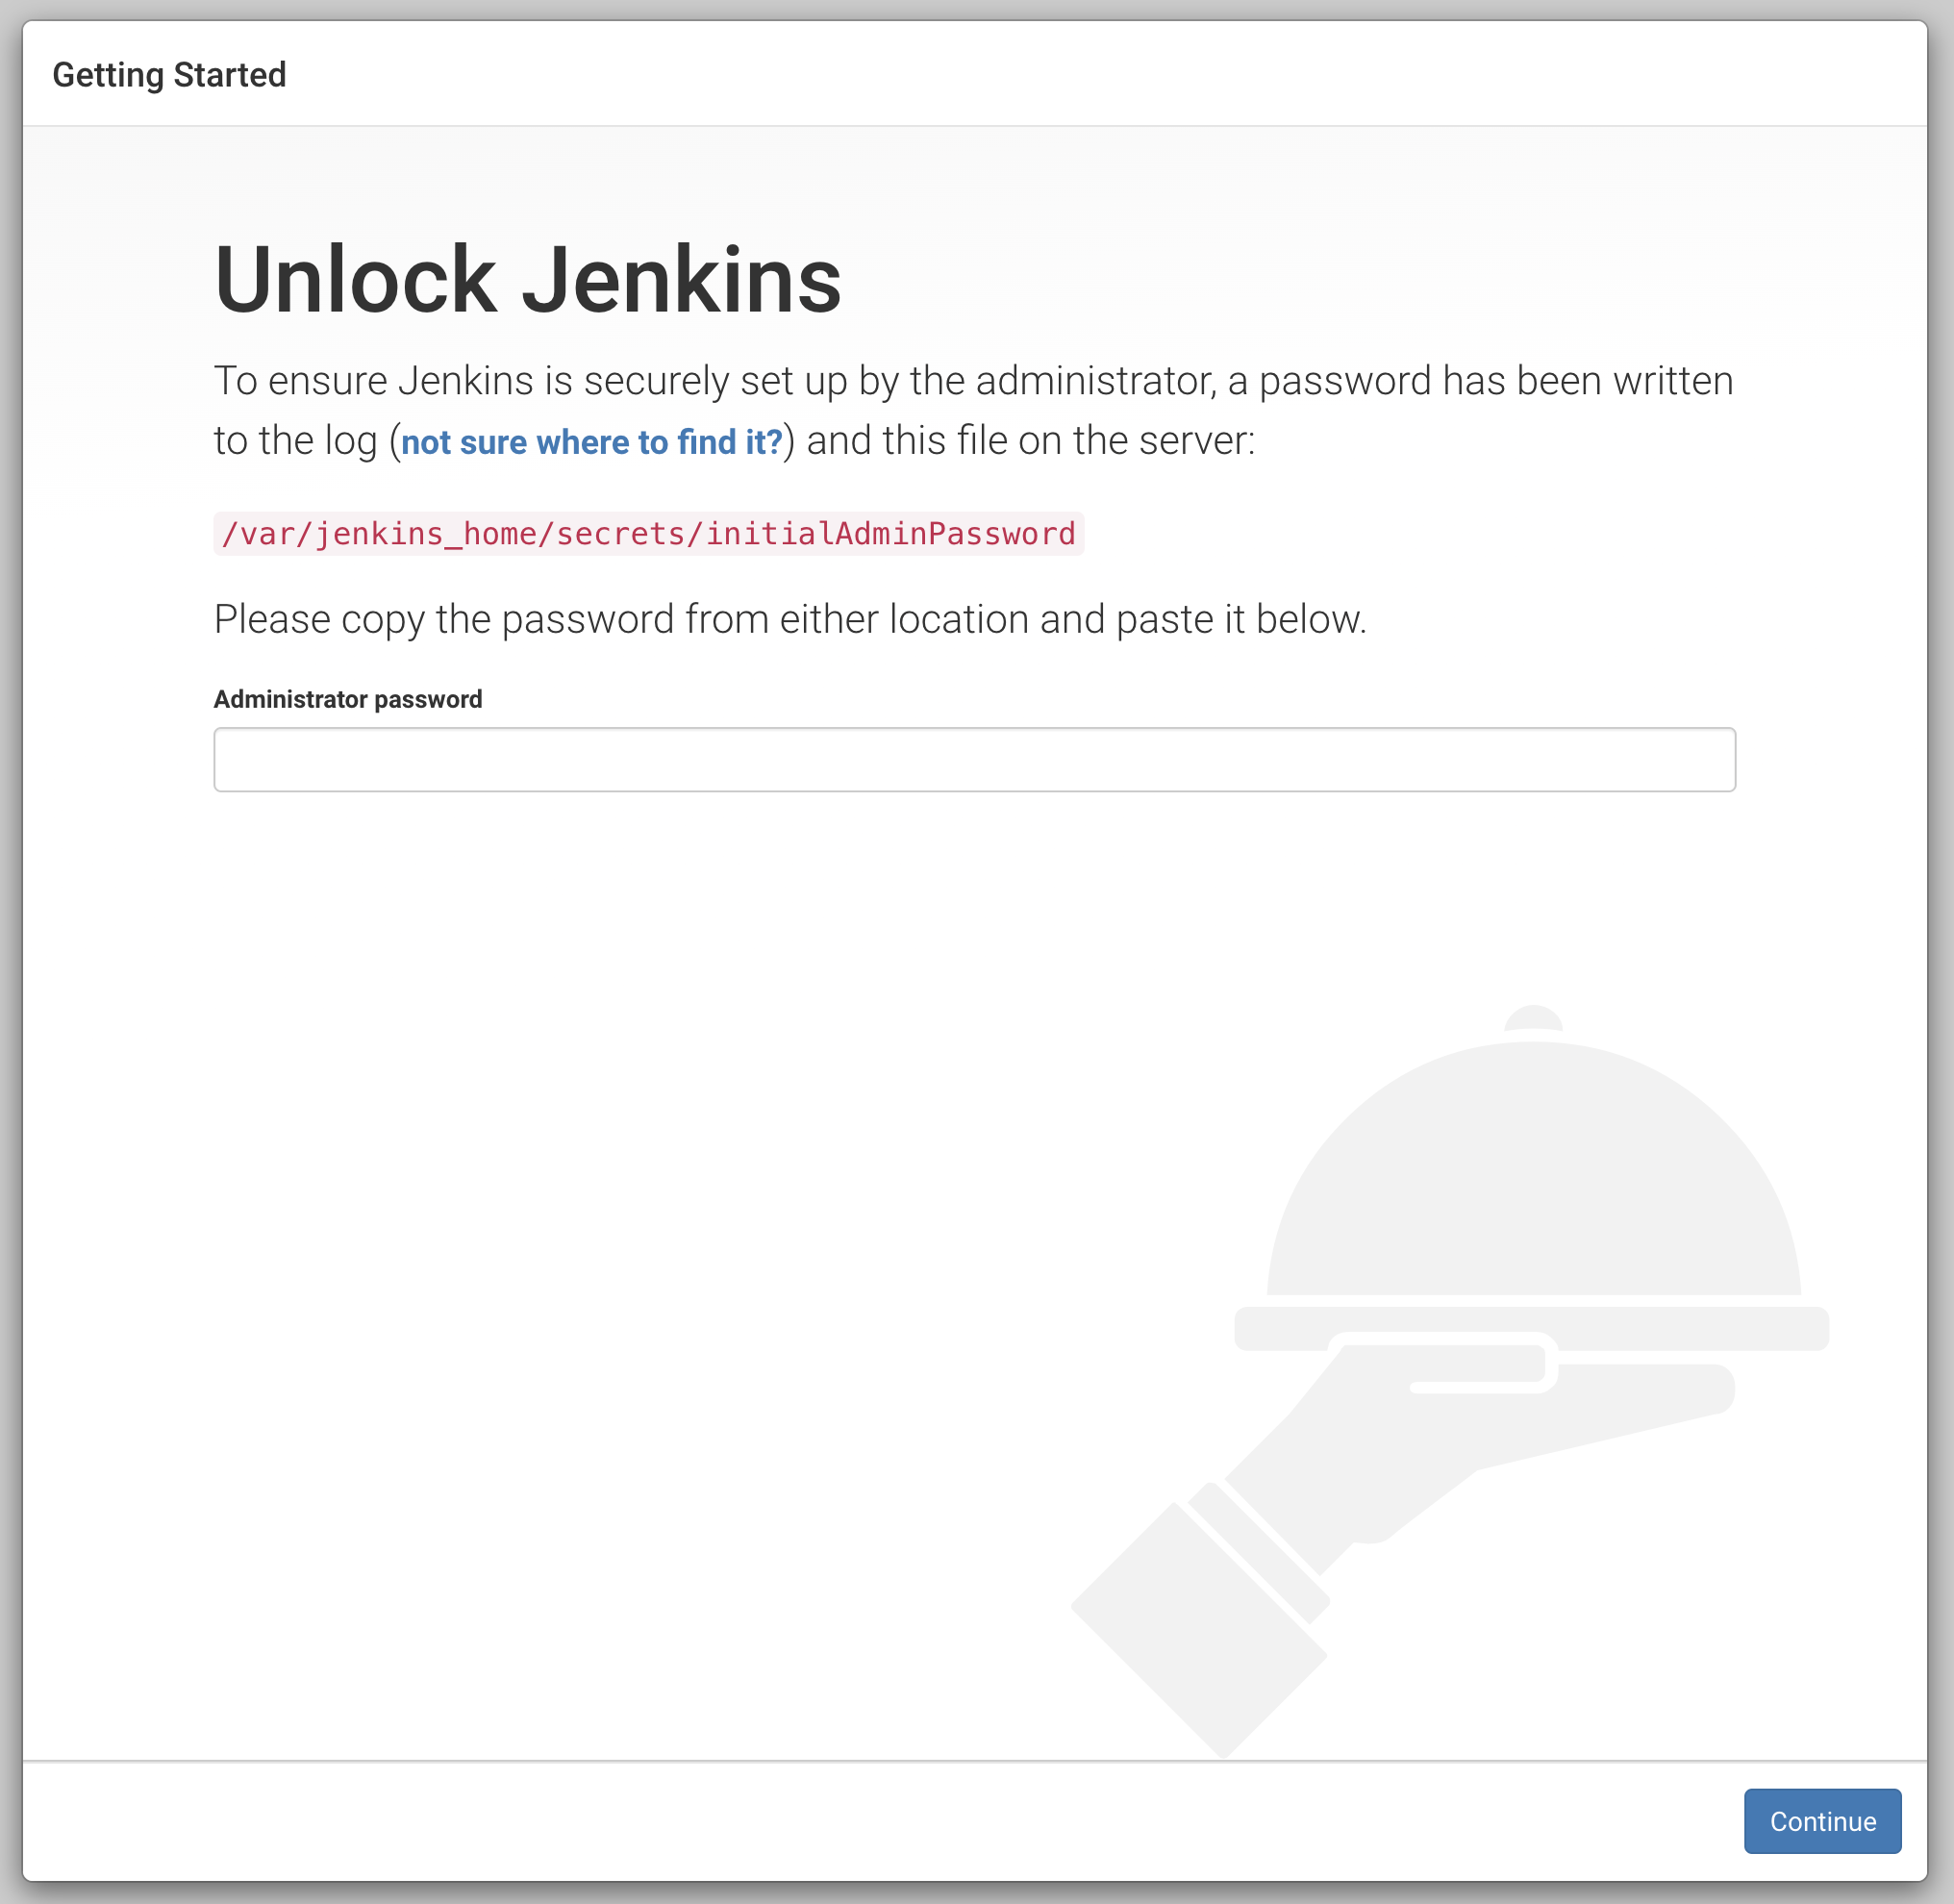
Now run the following command to get the initial admin password from the Jenkins container:
$ docker exec -it jenkins cat /var/jenkins_home/secrets/initialAdminPassword
Now copy the output and paste it on the Jenkins UI.
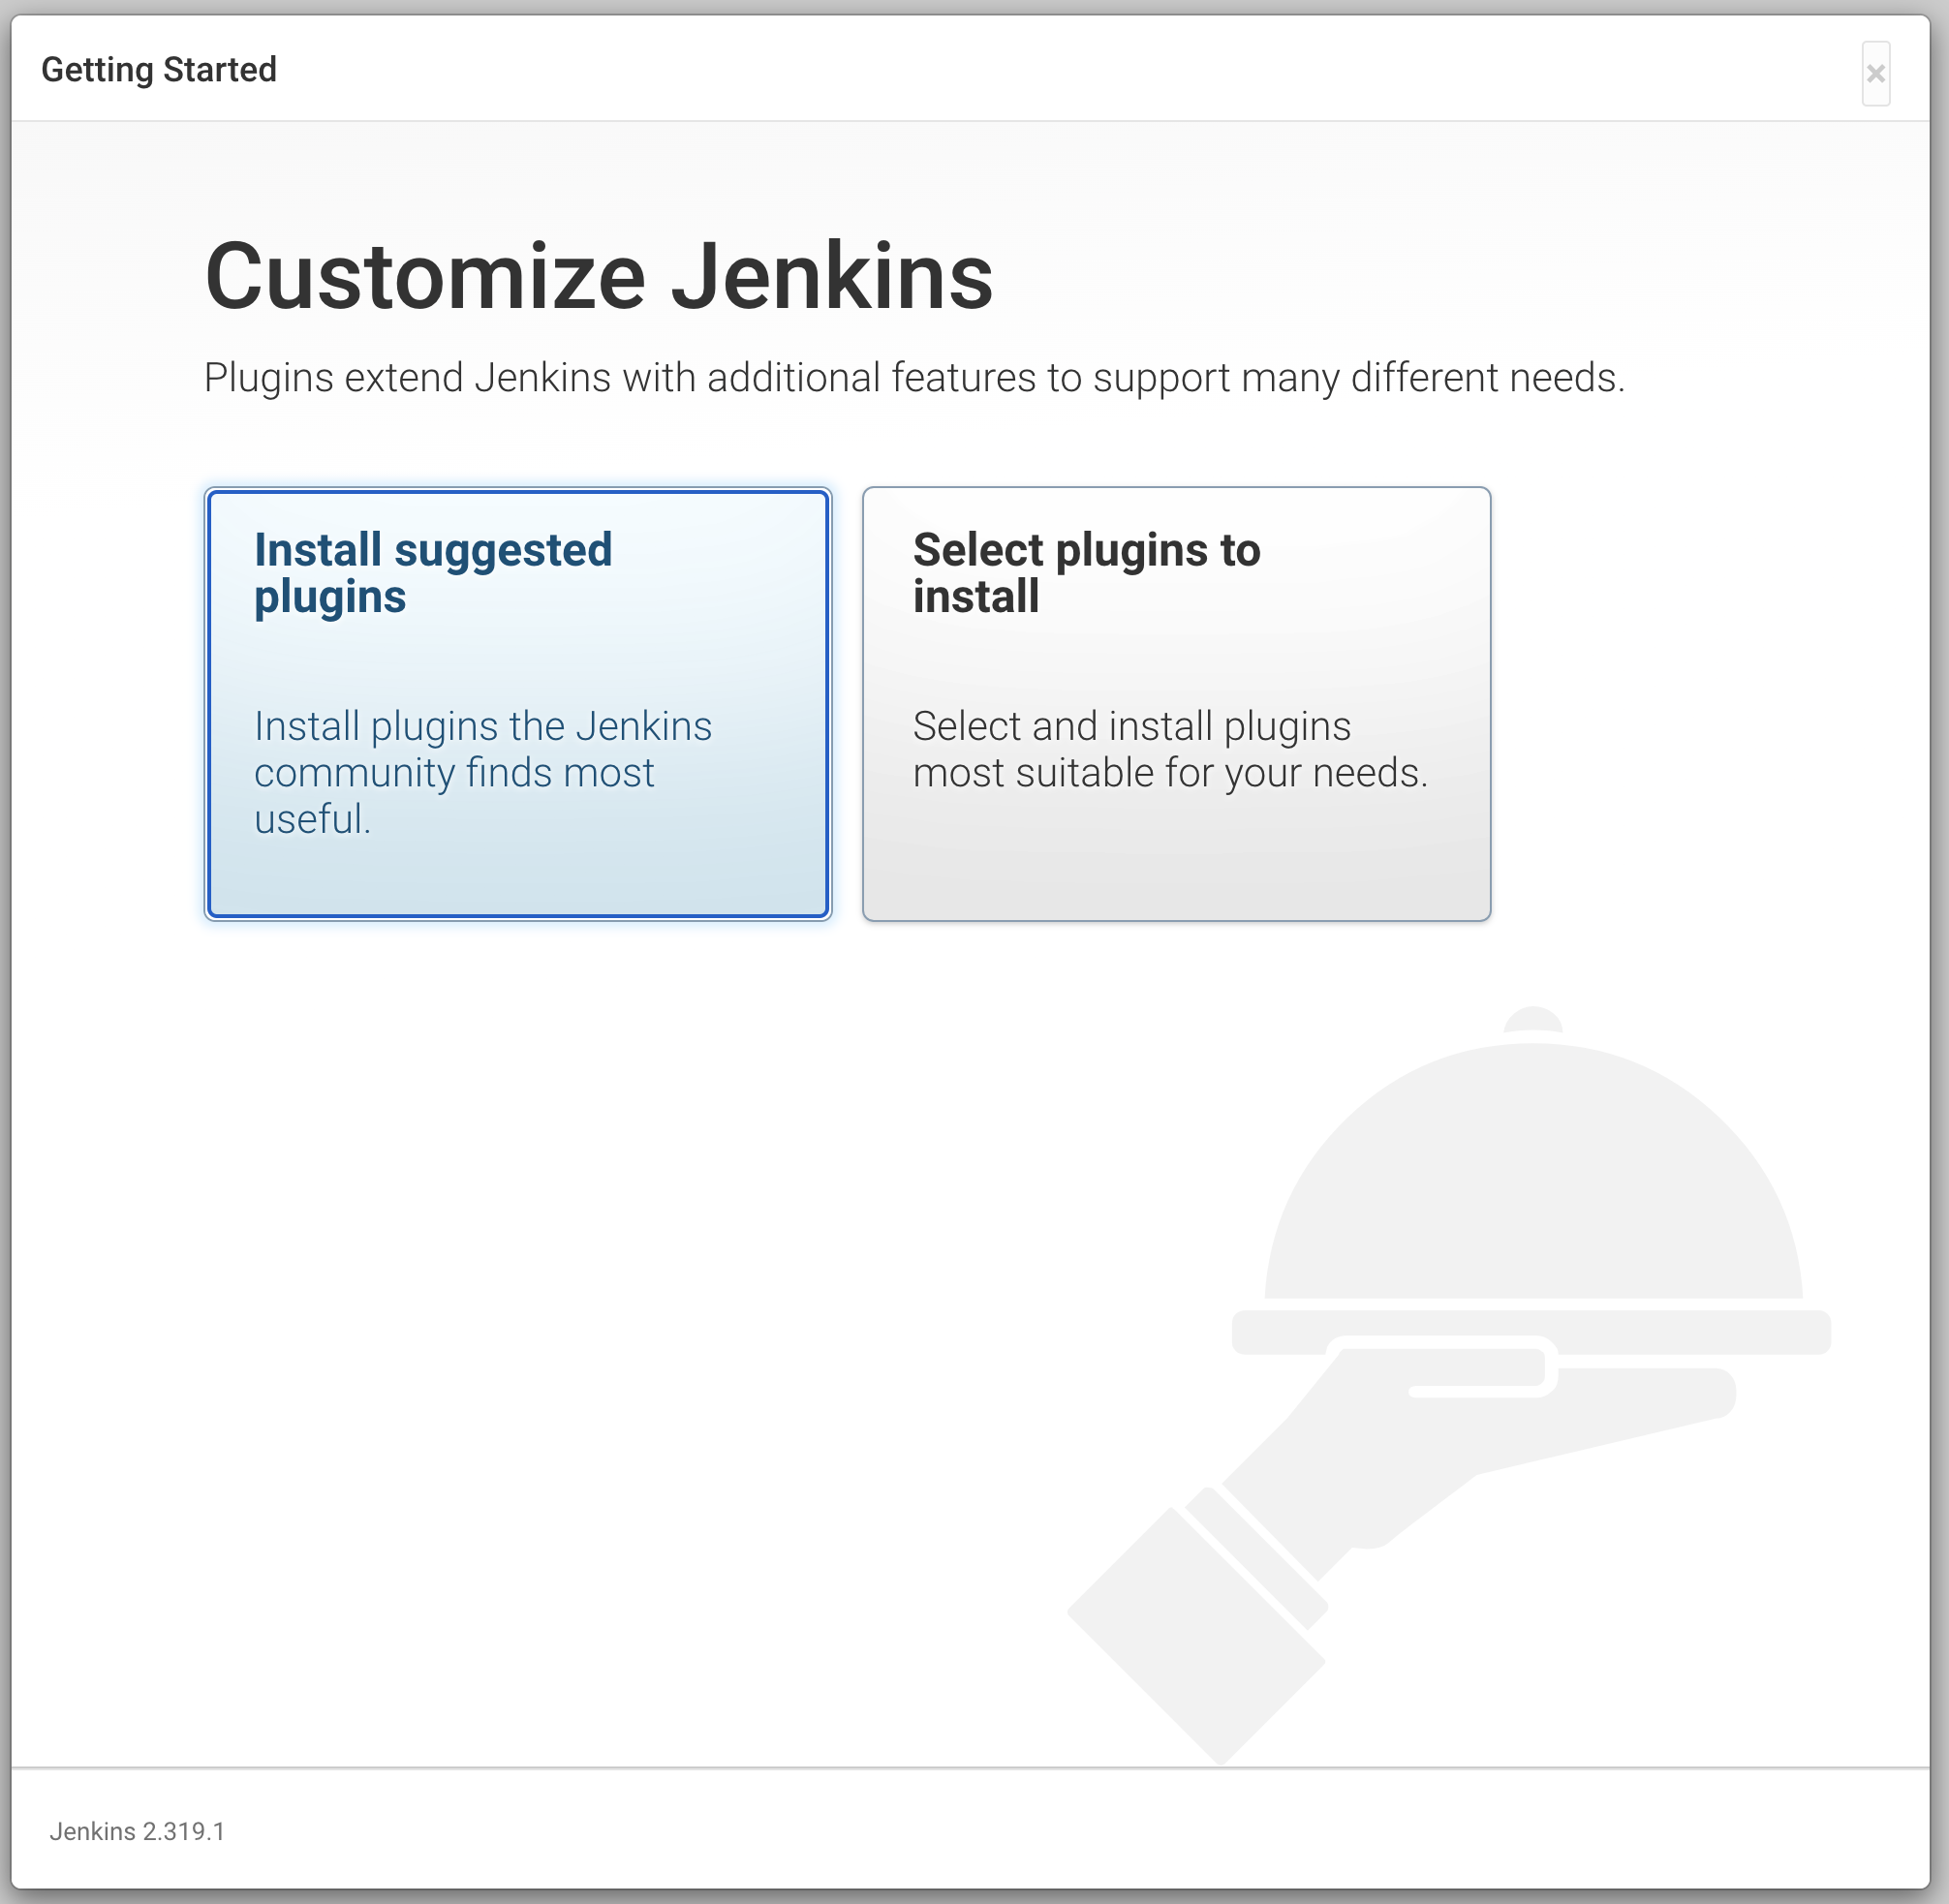
Select “Install suggested plugins” and wait for all plugins to install.
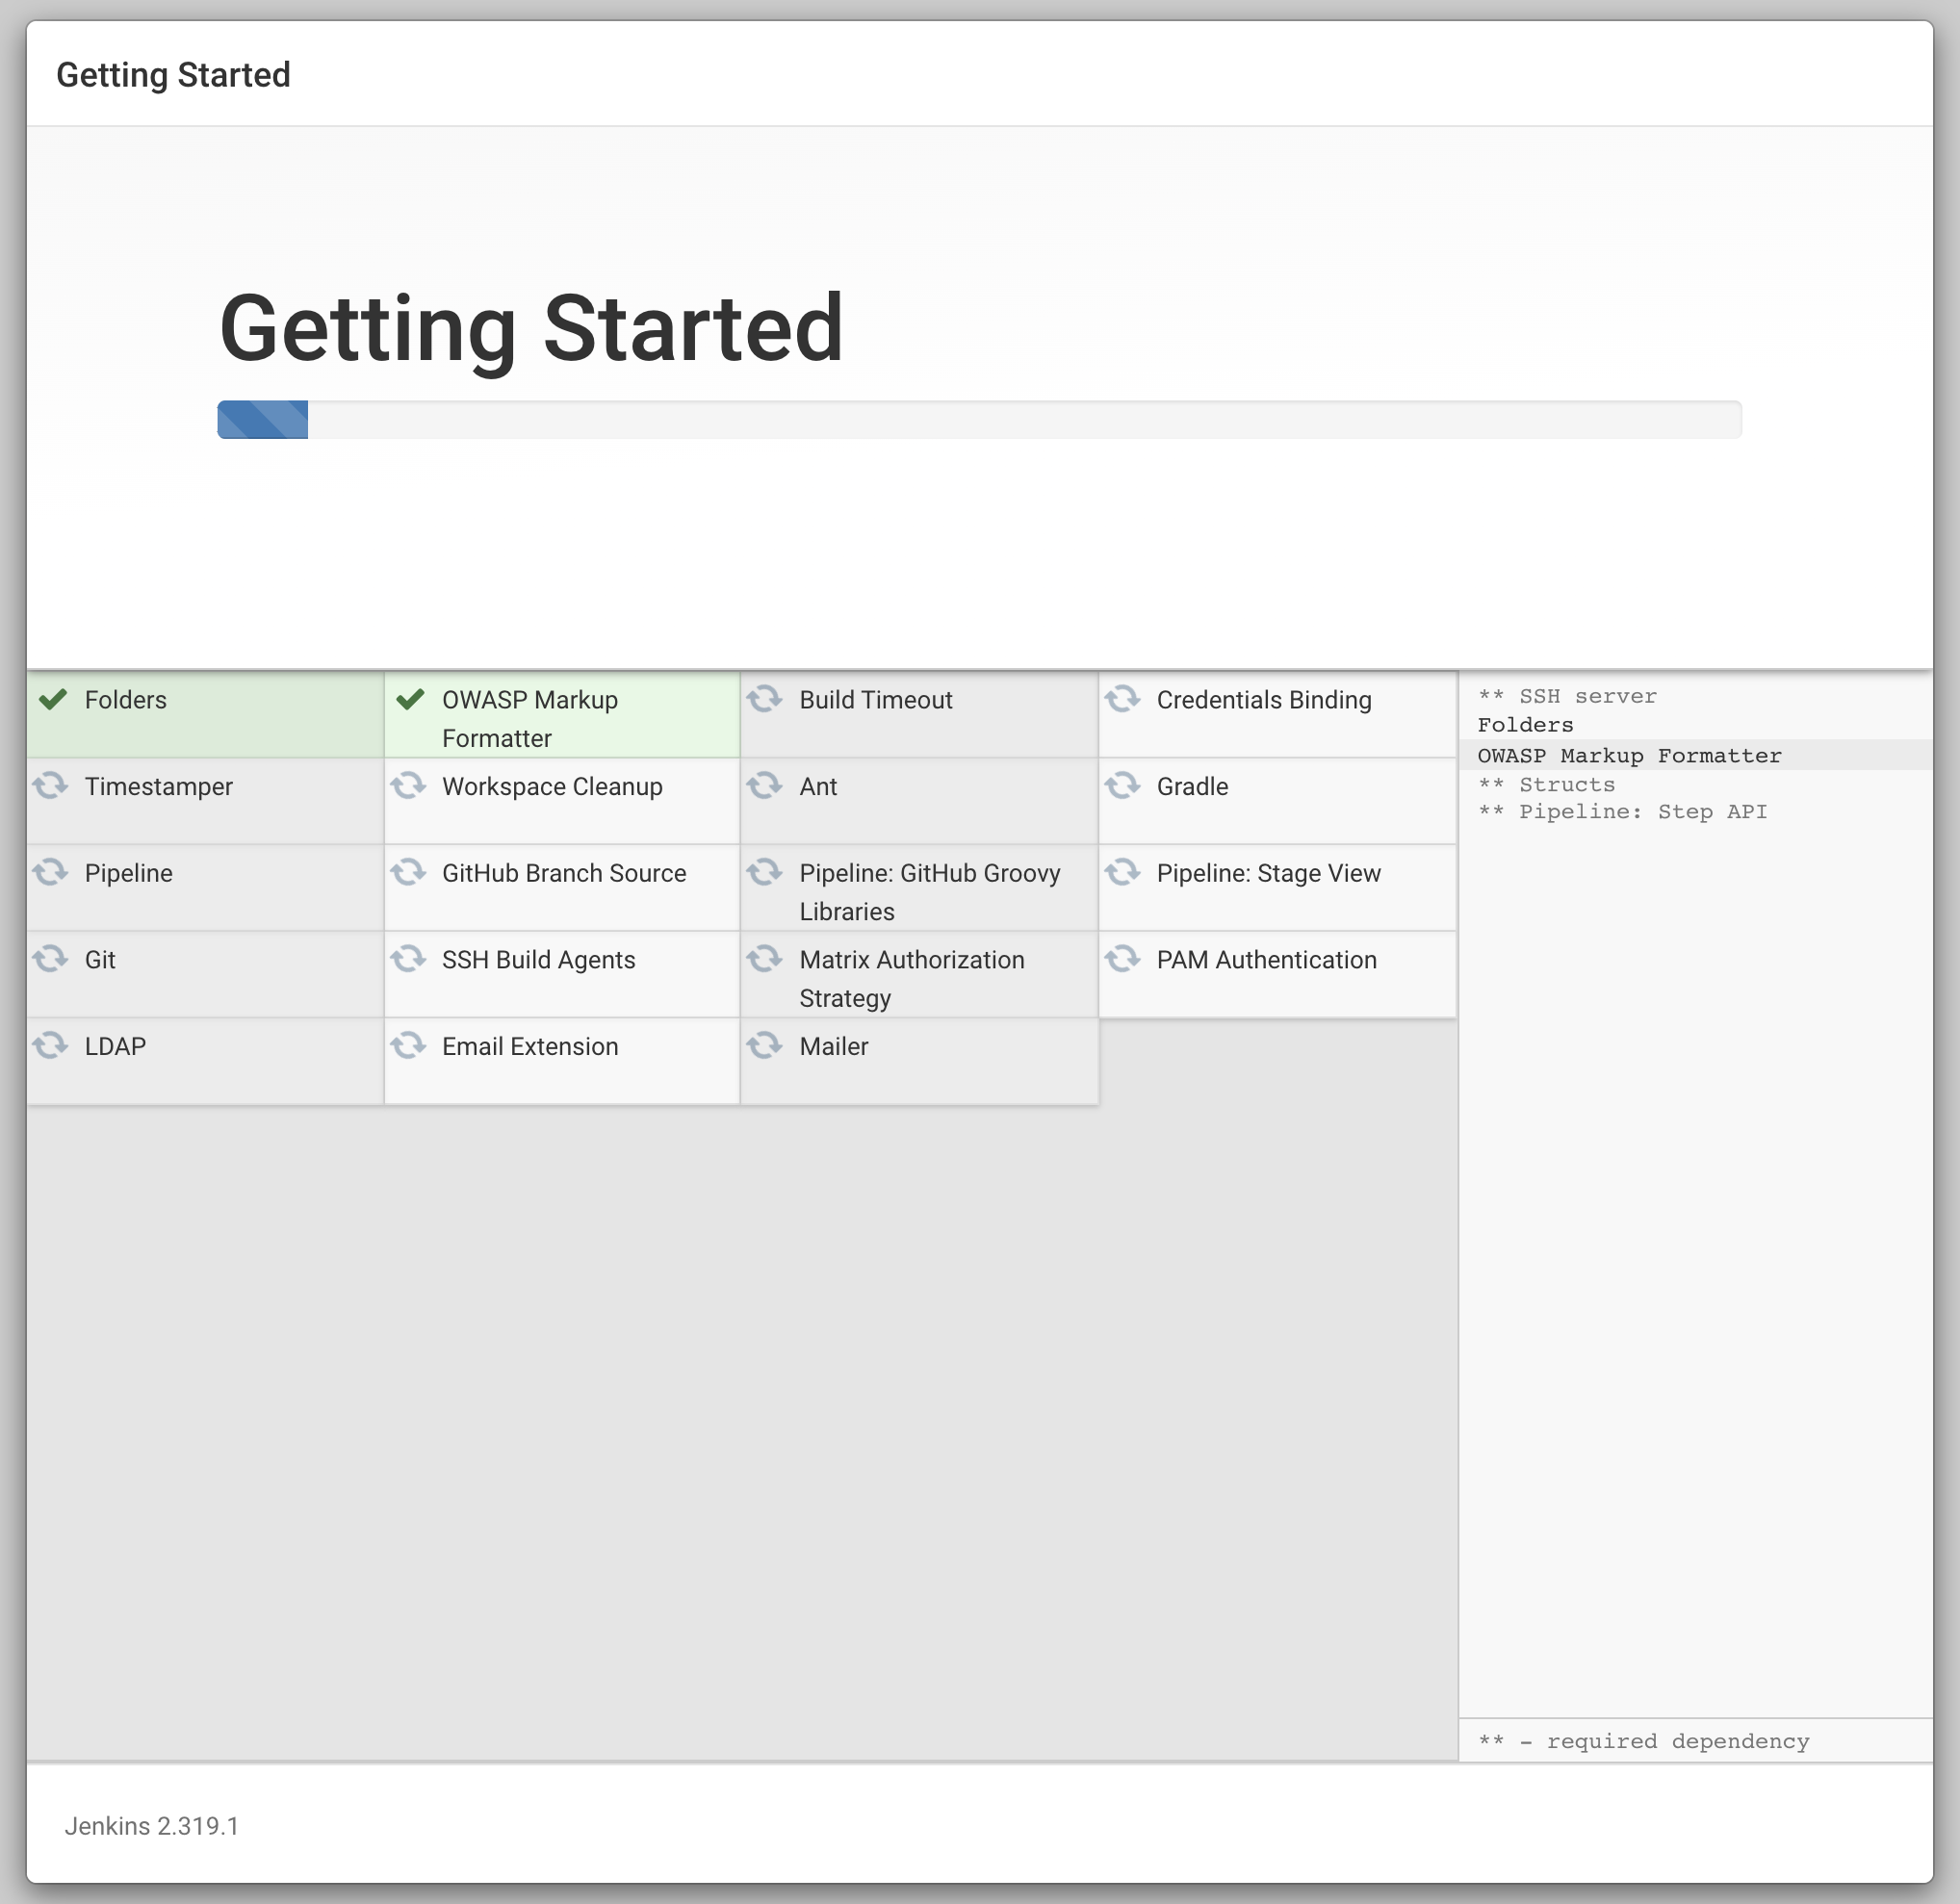
Fill in the user details.
Now go to Manage Jenkins -> Manage Plugins -> Available. Search Kubernetes and select Kubernetes. Then click on Install without restart.
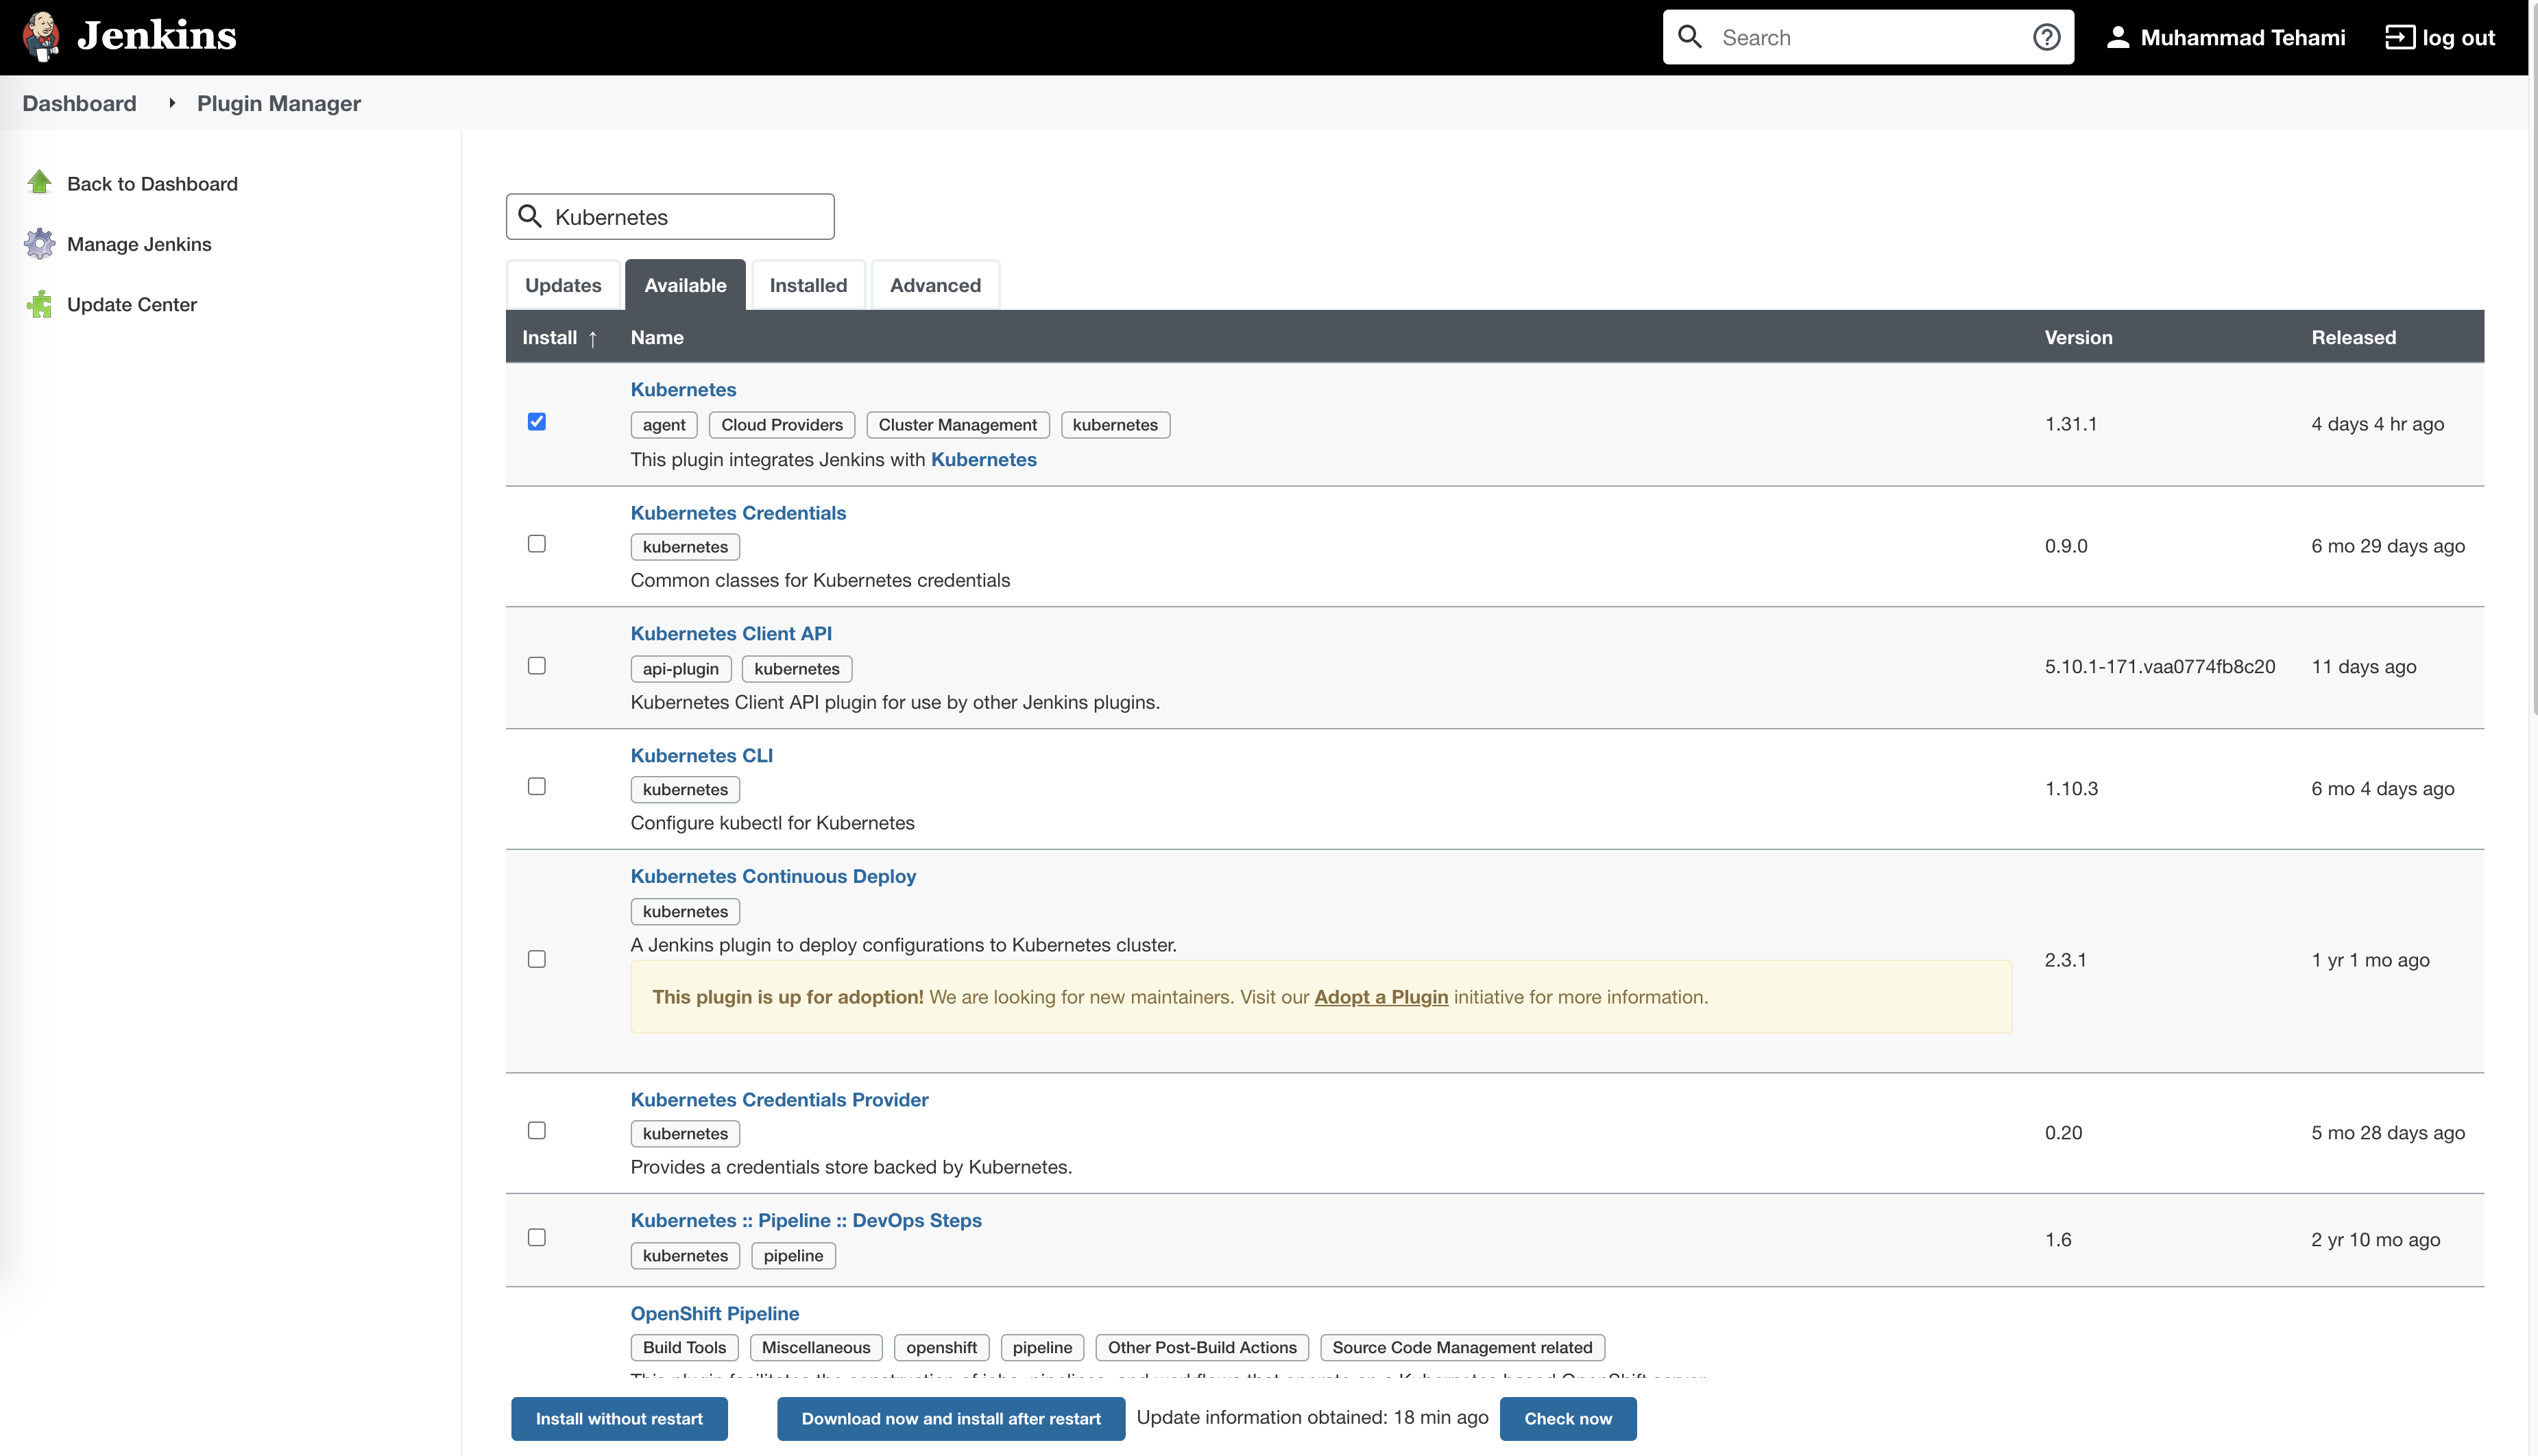
Check “Restart Jenkins when installation is complete and no jobs are running” on the next page.

We have our Jenkins up and running with the Kubernetes cloud plugin.
Setup Minikube and Credentials
Start Minikube
$ minikube start
Create a namespace for Jenkins agents.
$ kubectl create ns jenkins
Open ~/.kube/config file. The contents of this file should look like something similar to the following:
apiVersion: v1
clusters:
- cluster:
    certificate-authority: ~/.minikube/ca.crt
    extensions:
    - extension:
        last-update: Sat, 19 Dec 2021 22:20:16 PKT
        provider: minikube.sigs.k8s.io
        version: v1.20.0
      name: cluster_info
    server: https://192.168.99.103:8443
  name: minikube
contexts:
- context:
    cluster: minikube
    extensions:
    - extension:
        last-update: Sat, 19 Dec 2021 22:20:16 PKT
        provider: minikube.sigs.k8s.io
        version: v1.20.0
      name: context_info
    namespace: default
    user: minikube
  name: minikube
current-context: minikube
kind: Config
preferences: {}
users:
- name: minikube
  user:
    client-certificate: ~/.minikube/profiles/minikube/client.crt
    client-key: ~/.minikube/profiles/minikube/client.key
Copy all the contents in a different file and replace certificate-authority, client-certificate, and client-key with certificate-authority-data, client-certificate-data, and client-key-data respectively. For values of these keys, we need base64 encoded data of the actual file reference. Repeat the following step for all three keys with their respective file and paste the output as a value.
$ cat ~/.minikube/ca.crt | base64
$ cat ~/.minikube/profiles/minikube/client.crt | base64
$ cat ~/.minikube/profiles/minikube/client.key | base64
The final file should look similar to the following file:
apiVersion: v1
clusters:
- cluster:
    certificate-authority-data: <base64_encoded_string>
    extensions:
    - extension:
        last-update: Sat, 19 Dec 2021 22:20:16 PKT
        provider: minikube.sigs.k8s.io
        version: v1.20.0
      name: cluster_info
    server: https://192.168.99.103:8443
  name: minikube
contexts:
- context:
    cluster: minikube
    extensions:
    - extension:
        last-update: Sat, 19 Dec 2021 22:20:16 PKT
        provider: minikube.sigs.k8s.io
        version: v1.20.0
      name: context_info
    namespace: default
    user: minikube
  name: minikube
current-context: minikube
kind: Config
preferences: {}
users:
- name: minikube
  user:
    client-certificate-data: <base64_encoded_string>
    client-key-data: <base64_encoded_string>
Go to Manage Jenkins -> Manage Credentials -> Global credentials -> Add Credentials. Select Kind as Secret file, Choose the file to upload we created earlier, give any ID e.g. minikube-kubeconfig. Hit OK to create.
Configure Kubernetes Cloud in Jenkins
Go to Manage Jenkins -> Manage Node and Cloud -> Configure Clouds -> Add a new cloud -> Kubernetes -> Kubernetes Cloud Details.
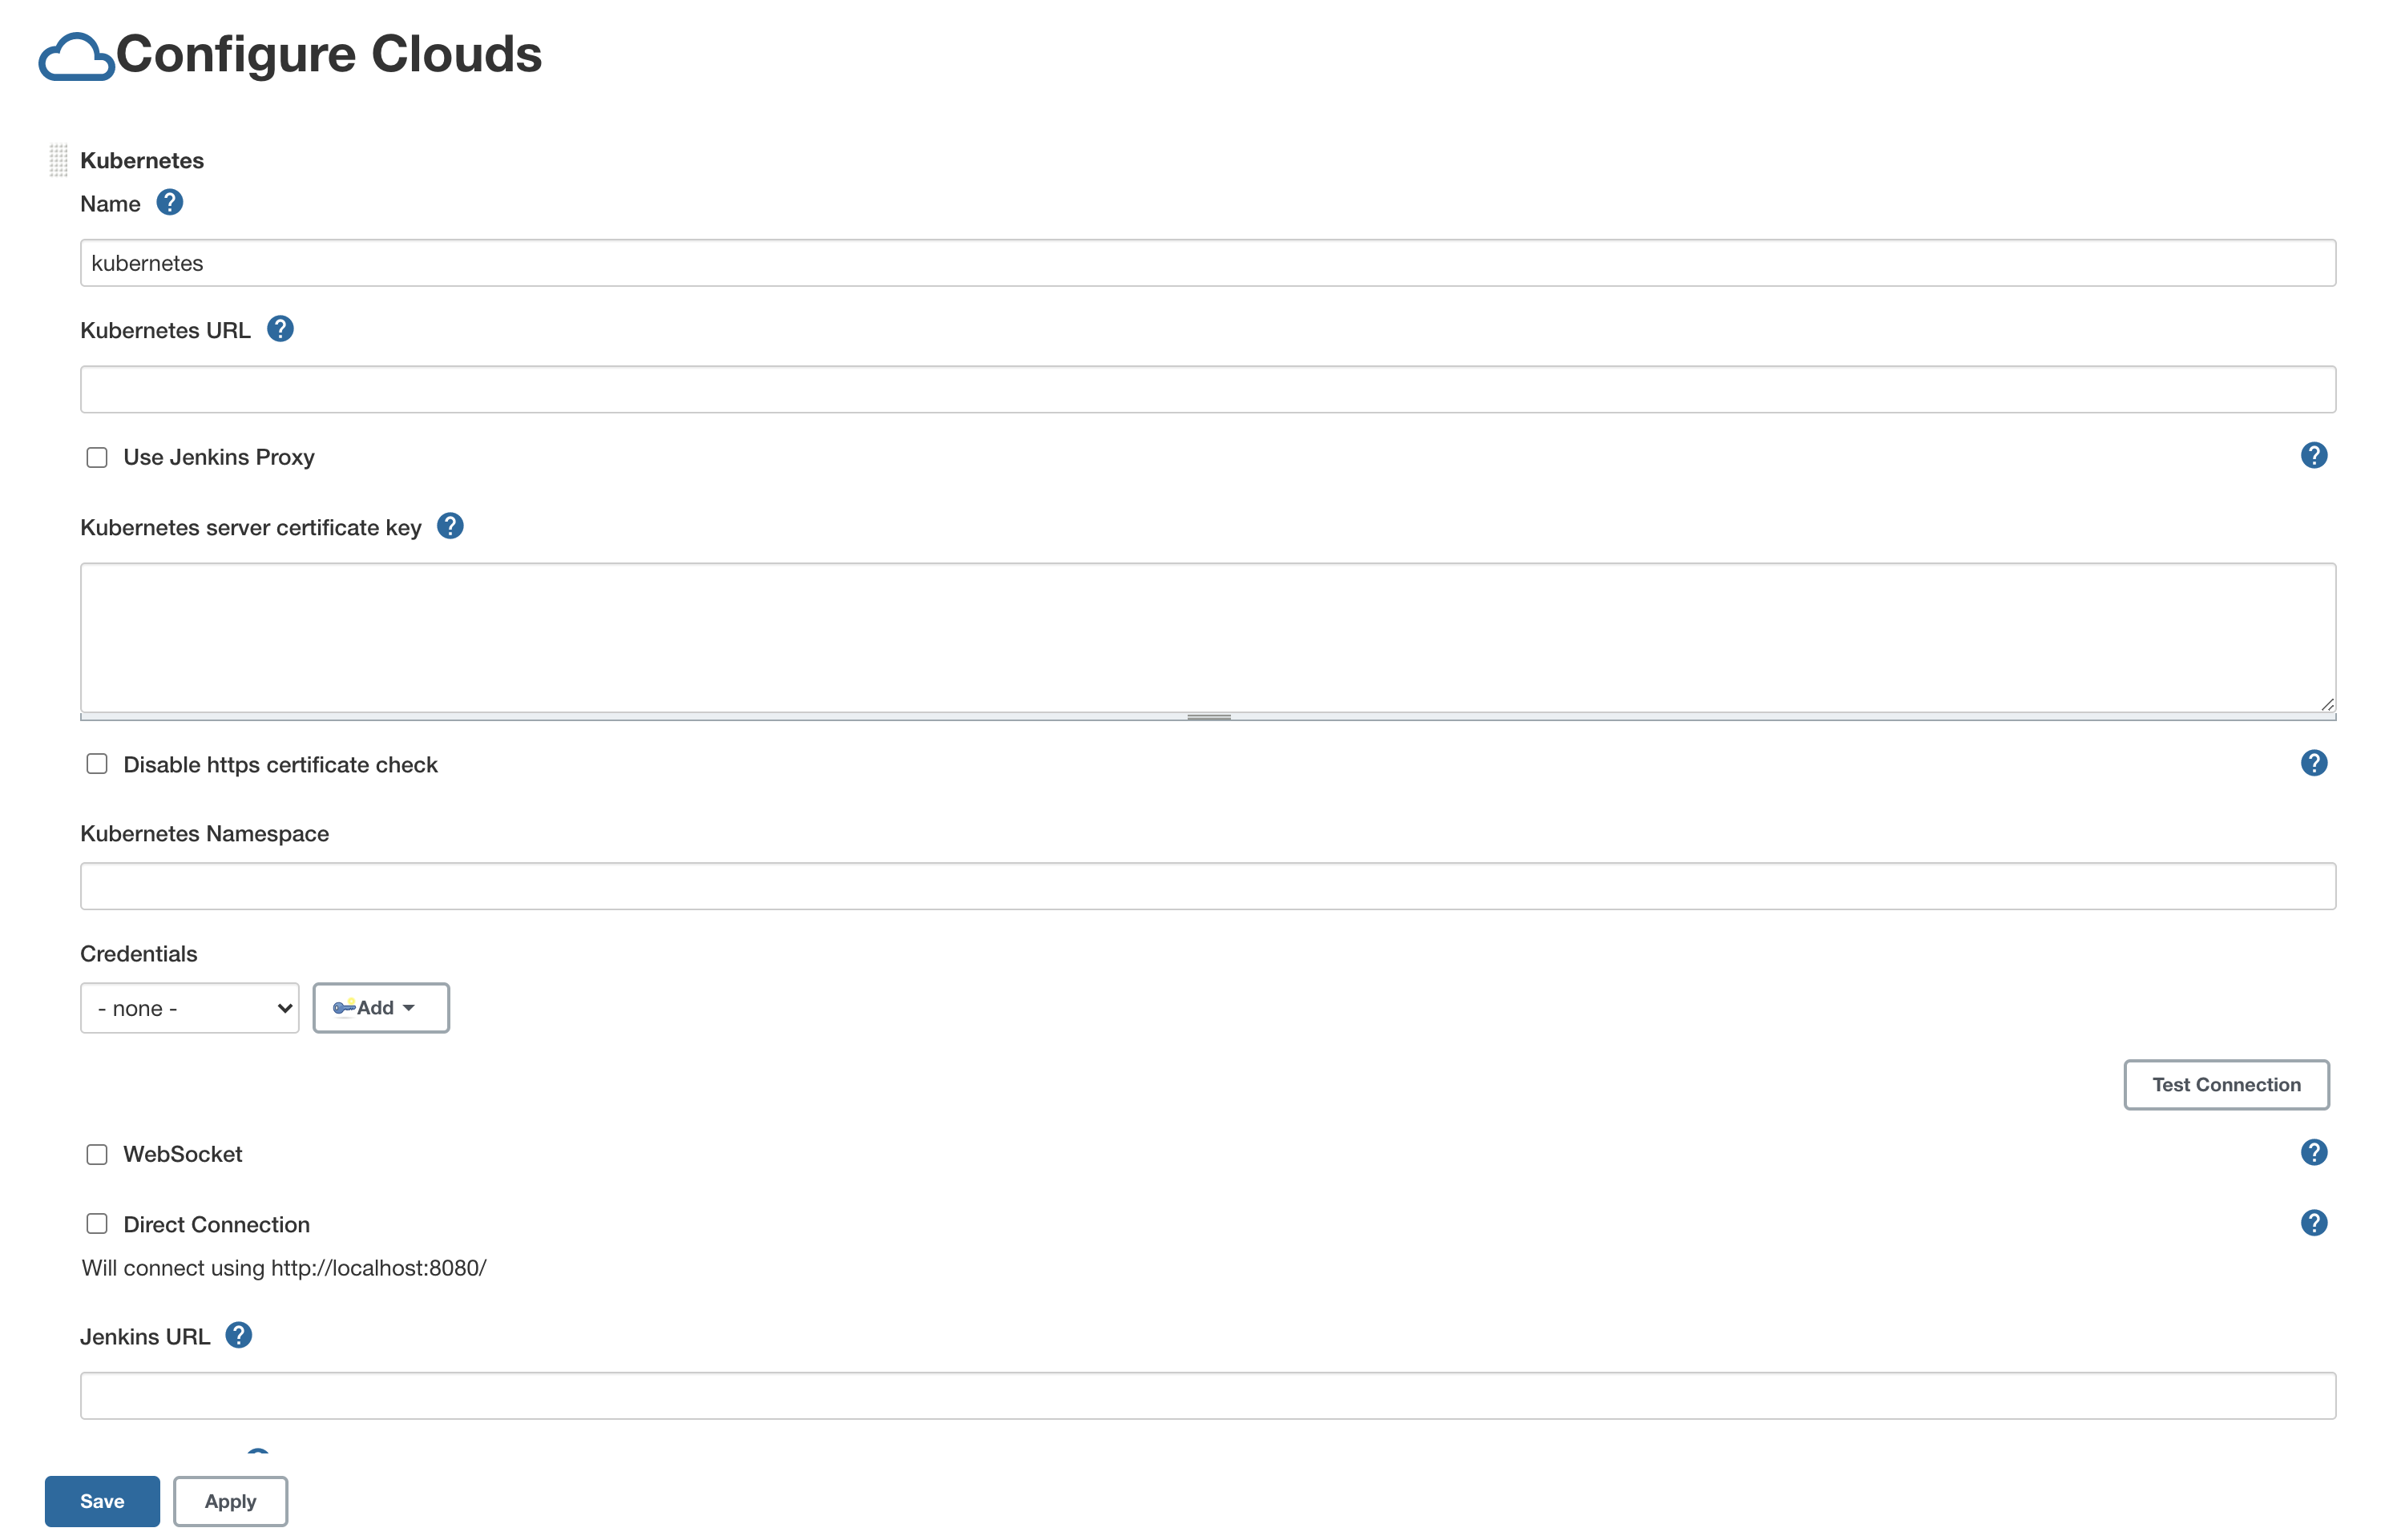
Select Credentials created in the previous step and click Test Connection.

Save cloud and add a new pod template for Jenkins agent default pod. Click on Pod template details… as follows:
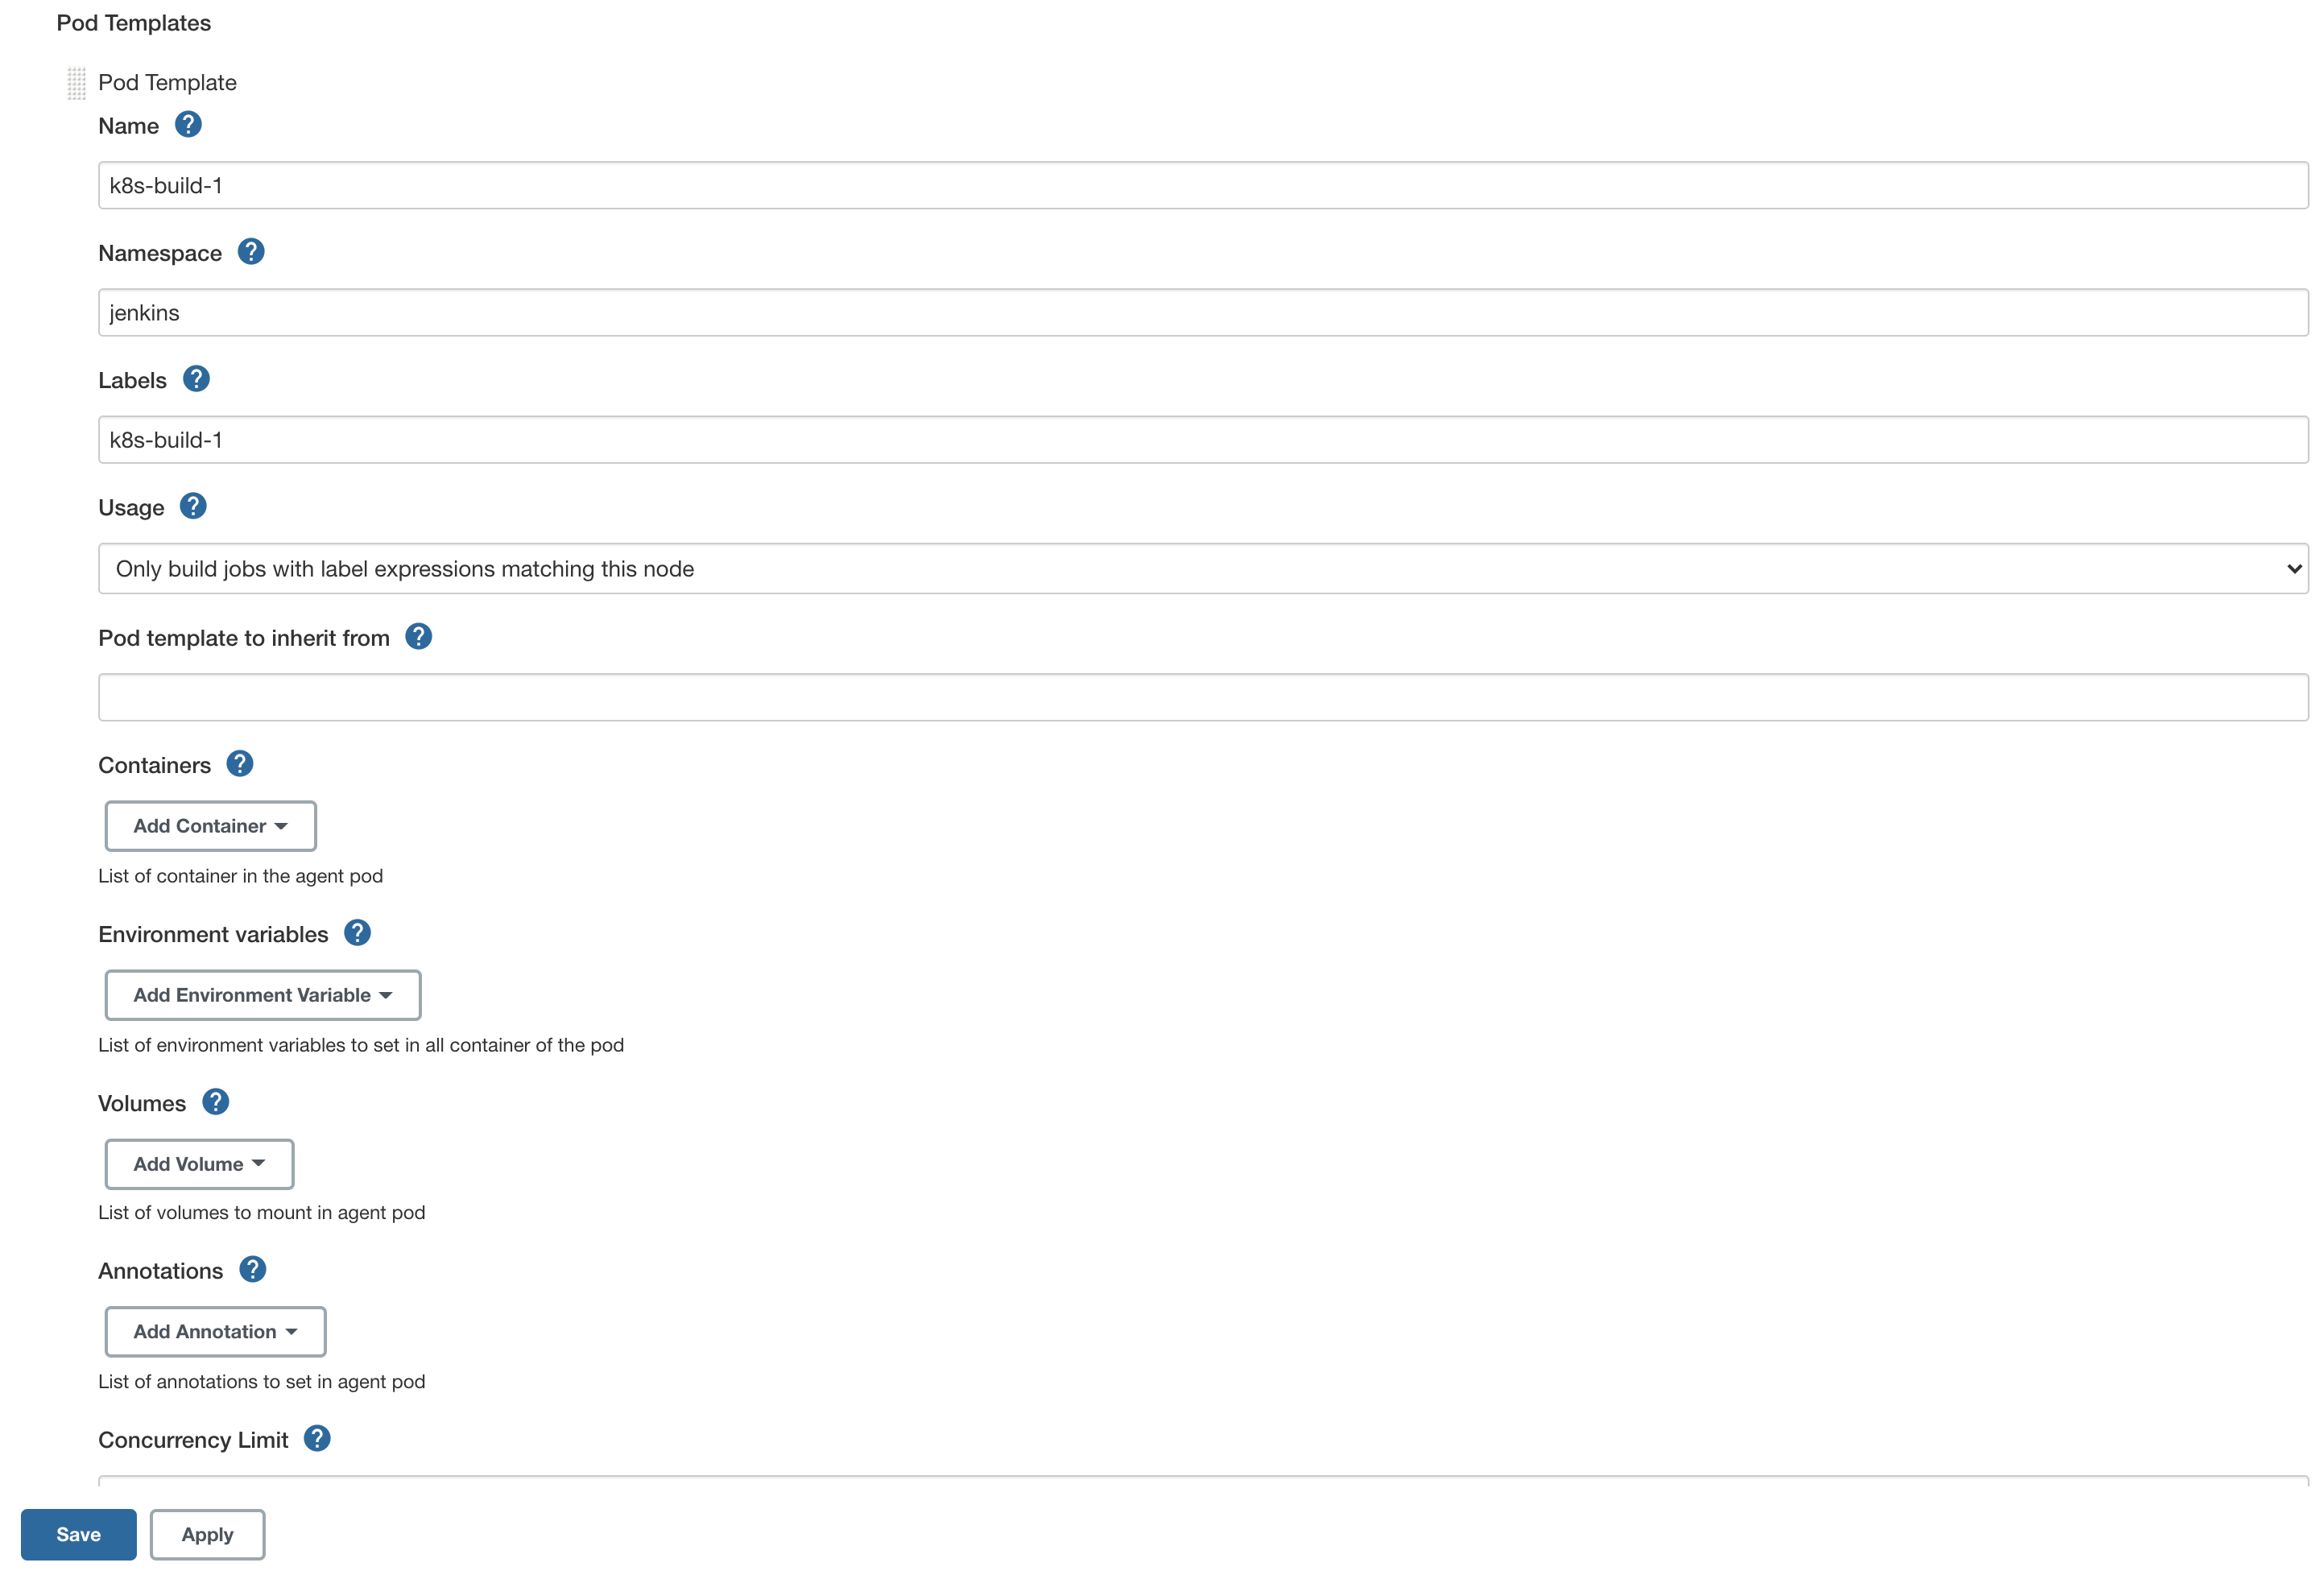
Hit Save.
Go to Manage Jenkins -> Configure System -> Jenkins URL and put your private IP in there.
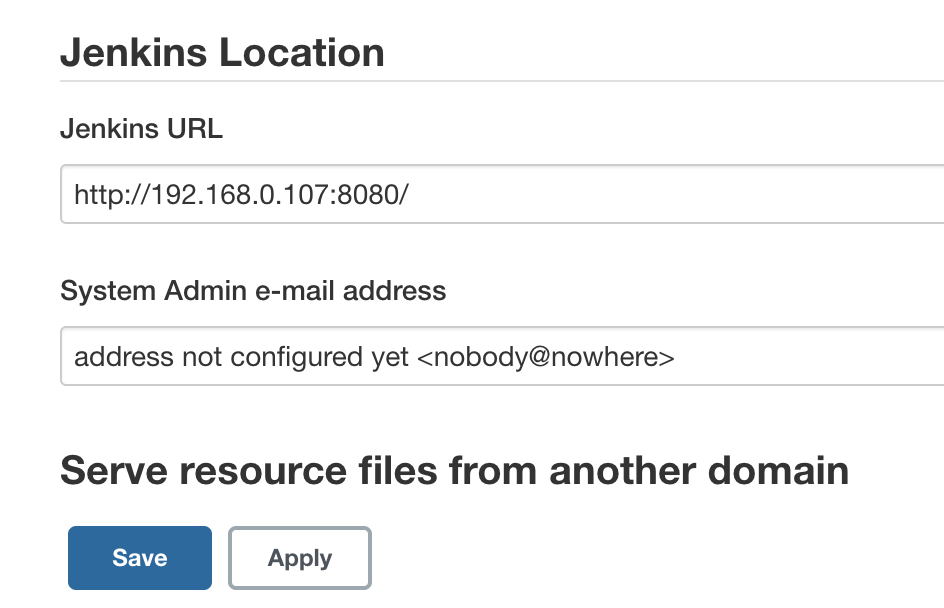
Hit Save.
Running First Build using On-Demand Agent as Kubernetes Pod
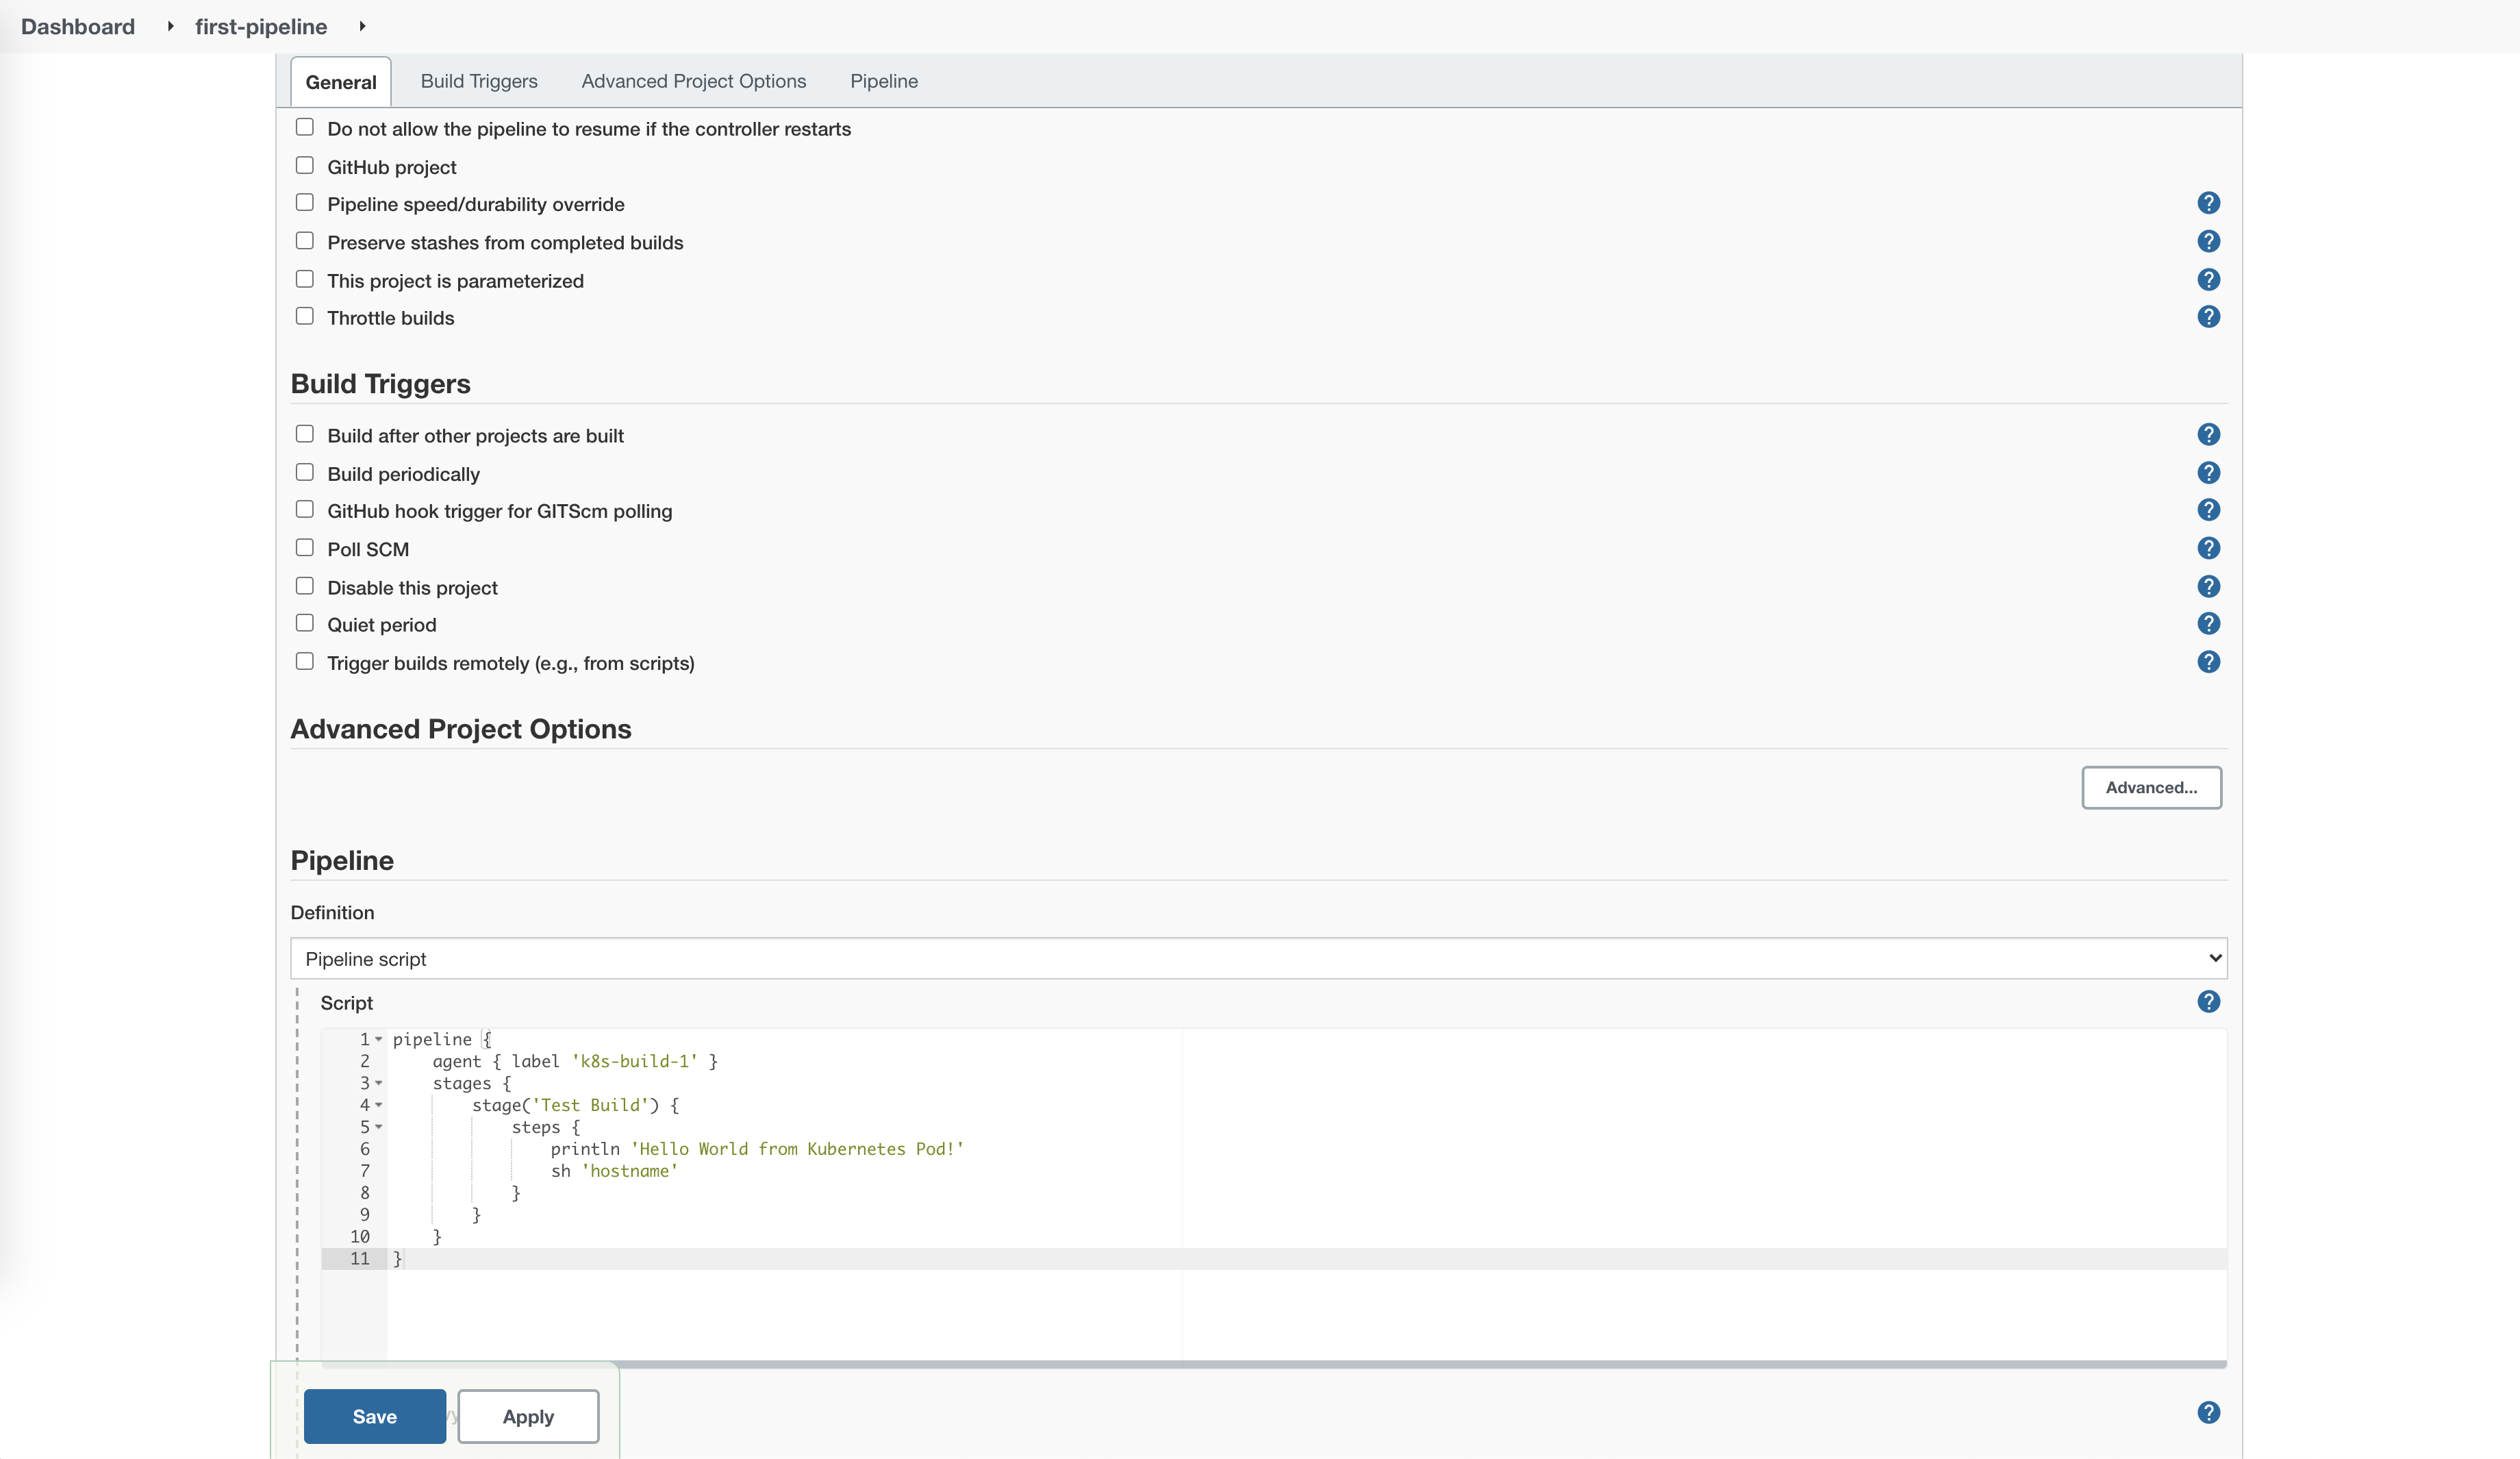
Open Jenkins dashboard and create a new pipeline with following content:
pipeline {
    agent { label 'k8s-build-1' }
    stages {
        stage('Test Build') {
            steps {
                println 'Hello World from Kubernetes Pod!'
                sh 'hostname'
            }
        }
    }
}
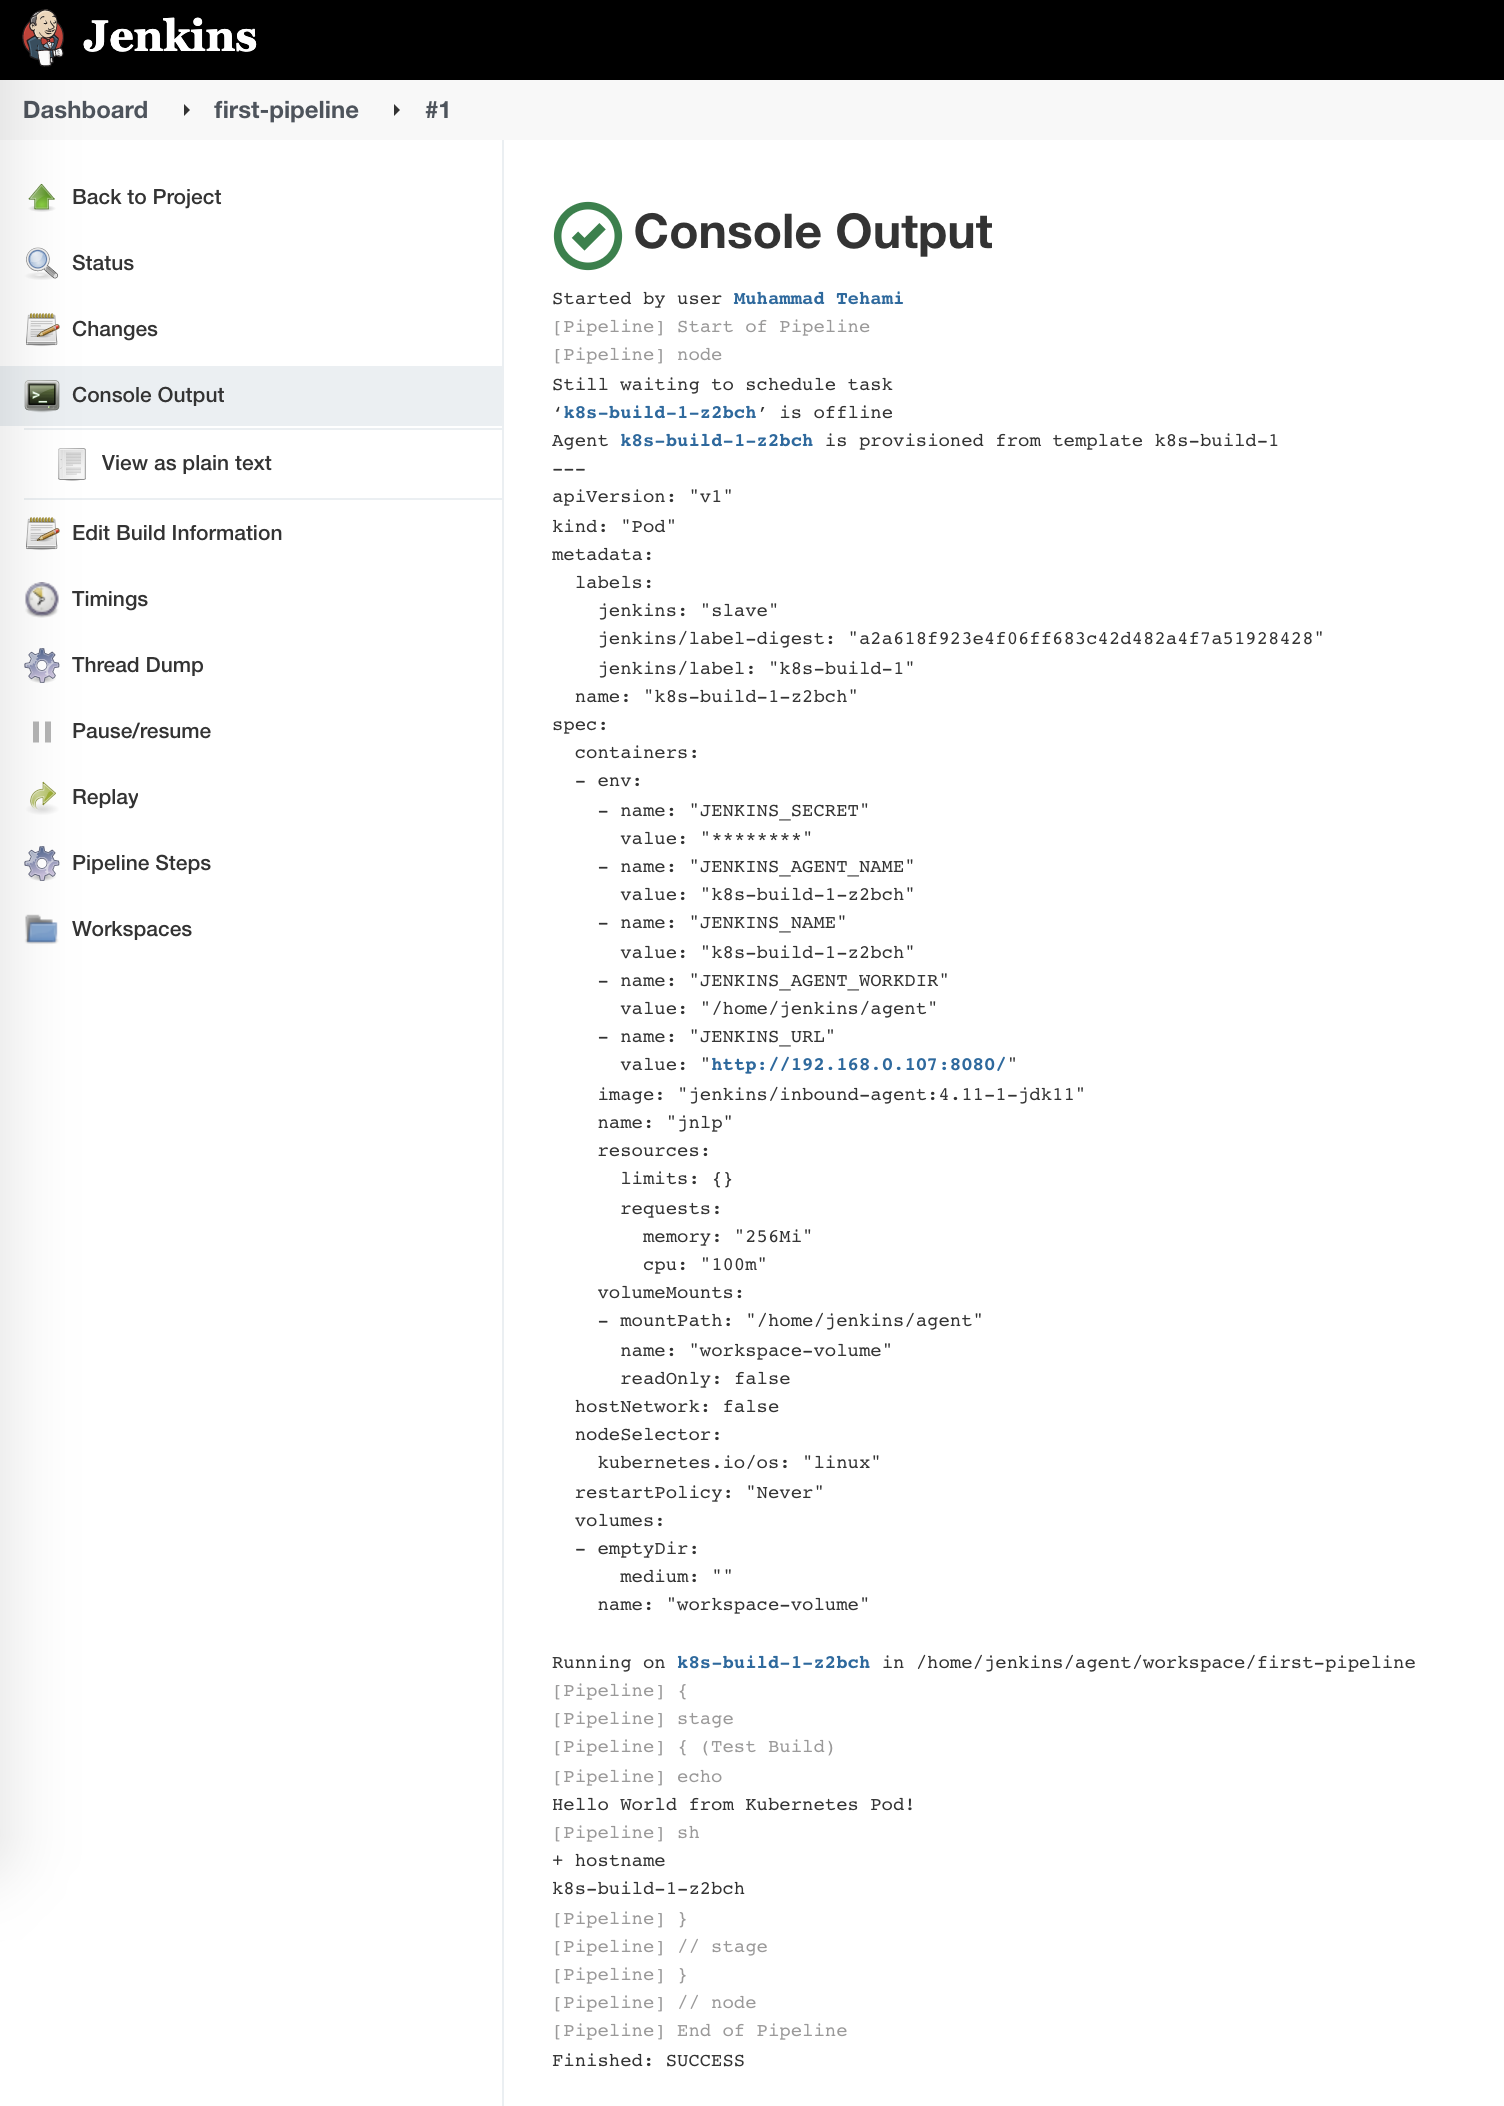
Now run your first pipeline and check logs
Conclusion
Currently, our Jenkins on-demand agent running as Kubernetes pod is using jenkins/inbound-agent:4.11–1-jdk11 image. We can create multiple customized images using this image as a base for our required needs and create multiple pod templates with different labels for different CI requirements.